Wind noise can ruin a perfectly good video. Earlier, you either had to reshoot the scene or sit for hours trimming low frequencies by hand. Today, however, it takes just a minute or two to remove almost any type of wind noise (heavy gusts, low-end rumble, mic buffeting, background hiss) from your videos.
In this guide, we’ll show you how to remove wind noise from videos using tools that work on your computer, mobile, or in your browser. Some are free. Others are paid. But all of them are beginner-friendly.
More importantly, we don’t just list the tools. You’ll get clear, step-by-step instructions to use them properly and keep your videos sound natural even after the cleanup.
How to Remove Wind Noise from Videos with Online Tools
Let’s start with the online tools. They are built for speed and simplicity. And there’s no learning curve. They run directly in your browser, so you can use them on a laptop, desktop, or even your mobile browser.
Way 1. Use Mediaio AI Video Enhancer
Best for:
Vloggers or content creators who want to remove wind noise from video files instantly and get natural results.
Ease of use:
Easy — simple drag-and-drop interface with automated AI processing.

Mediaio stands out as a top online choice because it works as a dedicated all-in-one media toolkit that processes video files directly.
Its AI models are trained to recognize wind rumble, hiss, and background interference and clean it with a single click. So your footage comes out clearer with vocals preserved. And it works perfectly for video files of all types and sizes: vlogs, home videos, podcasts, or tutorials. At the same time, Mediaio enhances microphone clarity. So any voice in the video will sound crisp and preserve its natural tone. Beyond audio cleanup, it also lets you upscale footage to 4K, reduce blur, stabilize shaky clips, and improve dull colors — all within the same workspace.
The free plan is fairly generous. It offers daily credits so you can test the workflow before deciding on a monthly or yearly plan.
Steps to Remove Wind Noise Using Mediaio AI Video Enhancer
Step 1. Visit mediaio.net and sign in to your account. The upload panel sits right in the center, click Upload Video.
Step 2. After the video is added, select Video Noise. Mediaio AI will target rumble and other background interference.
Step 3. Confirm the settings and processing will begin automatically. Once finished, download the cleaned video.

Way 2. Use Adobe Podcast
Best for
Podcasters, filmmakers, and audio purists who want a near one-click way to clean heavy wind noise and restore clear dialogue.
Ease of use
Medium — free users need to extract audio first, while paid users can upload video directly and adjust controls.

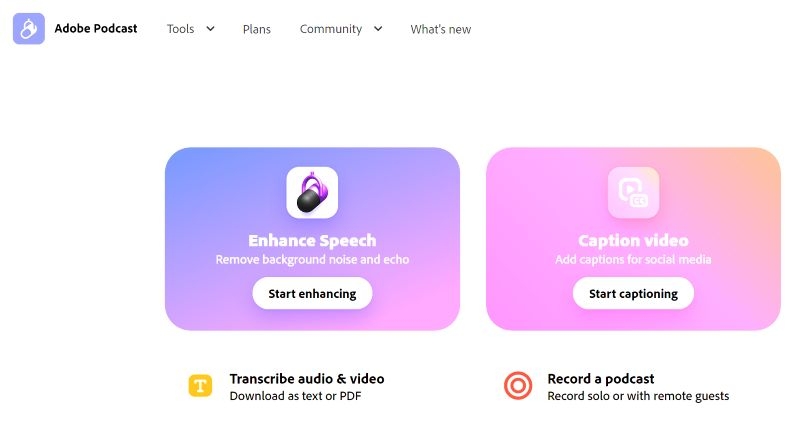
Whenever the Adobe name shows up, you expect a complex interface. Surprisingly, “Enhance Speech” feels the opposite. It runs fully in your browser and focuses on one thing — rebuilding clean speech with one click.
Rather than simply filtering noise, Adobe Podcast’s Enhance Speech feature analyzes the voice and reconstructs it, so it feels like it is recorded in a treated room. The newer V2 model has become really better at separating dialogue from wind, traffic, or hum while keeping the character of the speaker mostly intact.
Another thing to note is that the free tier limits. You get one hour of processing per day, with a file size limit of 500 MB. The biggest limitation, however, is that you can upload only audio (MP3 or WAV). Plus, the speech and background sliders stay fixed at 90% and 10%, respectively, so you cannot control how much noise is eliminated.
The paid plan costs US$9.99/month. It will unlock video uploads (MP4, MOV), batch processing, and full slider control.
Steps to Remove Wind Noise Using Adobe Podcast
Step 1. Separate the audio if you will use the free tier. Tools, like VLC, can export the soundtrack as MP3 or WAV.
Step 2. Go to podcast.adobe.com/enhance. Sign in.
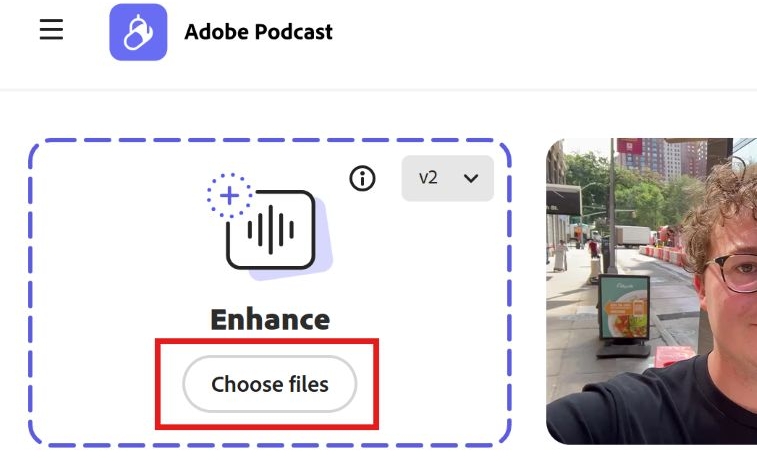
Step 3. Drag your audio (or video if you’re on premium) into the upload area.
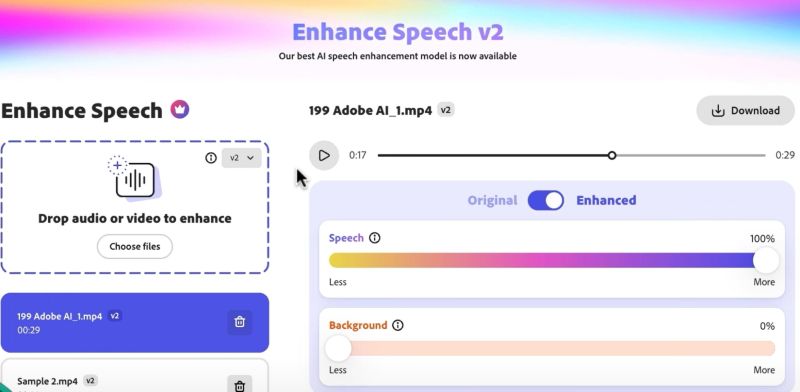
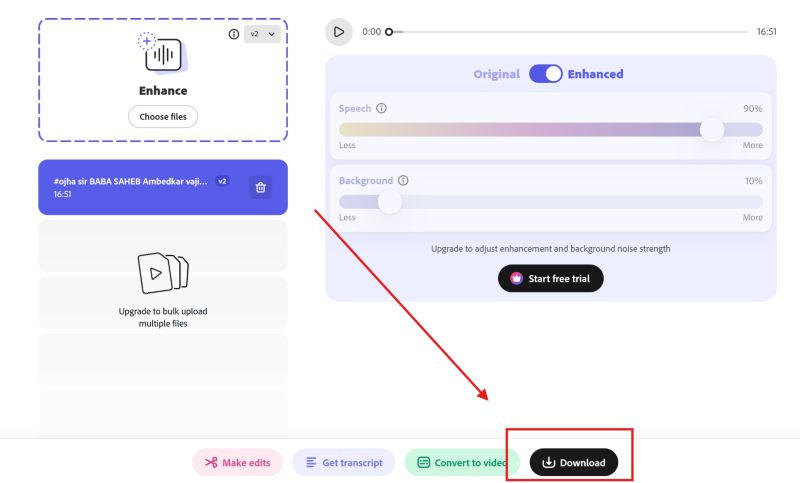
Step 4. Wait while the AI processes automatically. Free users will see fixed enhancement levels, while premium users can adjust sliders.
Step 5. Toggle between Original and Enhanced to preview the difference.
Step 6. Click Download to save the file (WAV).
Tip: If you’ve used the free version, merge the cleaned audio back into your video using editors like VLC.
Think of it this way — if you’re used to how Joe Rogan sounds, Adobe’s cleaned version will resemble him, but it will “not feel natural.”
Way 3. Use CapCut
Best for
Social media creators, TikToker, and bloggers who want an all-in-one browser workspace.
Ease of use
Easy — everything happens directly on the timeline with simple toggles.

CapCut is widely known for its mobile and desktop apps, but the online web editor is surprisingly capable as well. That said, it does not offer dedicated wind-noise removal tools, like its desktop counterpart.
You mainly get a basic noise reduction toggle (paid feature). And it works reasonably well for light wind hum, soft breezes, or air-conditioner hiss. Plus, you can adjust the volume alongside it.
Of course, compared to the desktop version, where features, like voice isolation and enhanced audio exist, the web editor feels limited. The paid plan costs US$19.99 per month. So if you only need a wind cleanup feature, consider it is expensive.
Steps to Remove Wind Noise with CapCut
Step 1. Open CapCut’s online editor and sign in. Choose to create a new project and then upload your video.
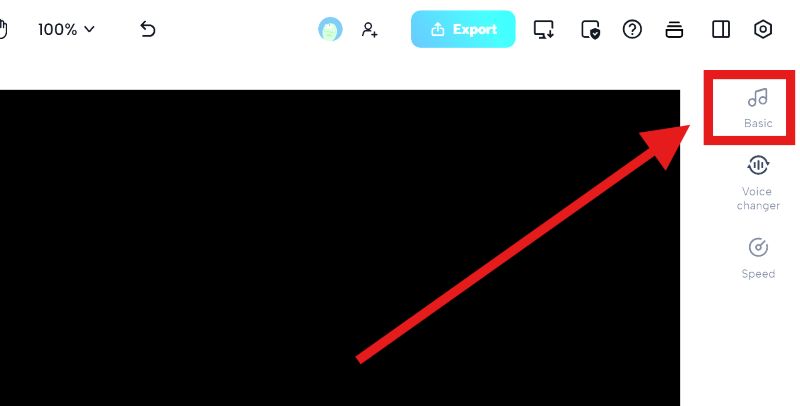
Step 2. Drag the video onto the timeline. On the right side, you’ll see some options. Choose Basic.
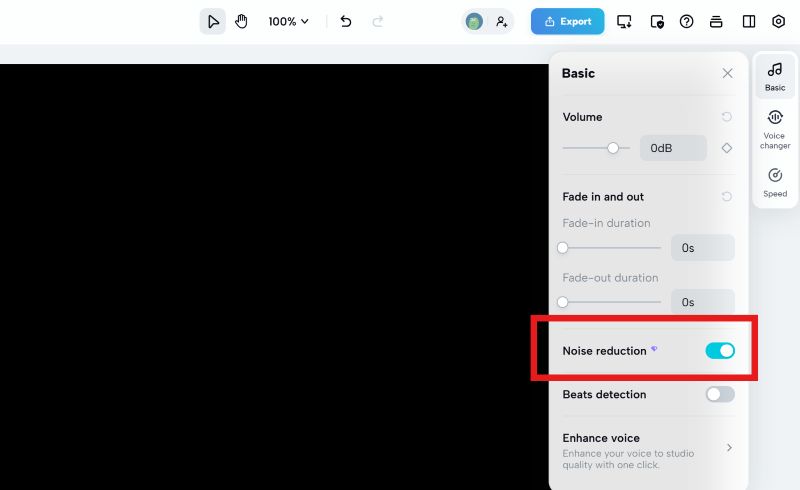
Step 3. Turn on Noise reduction.
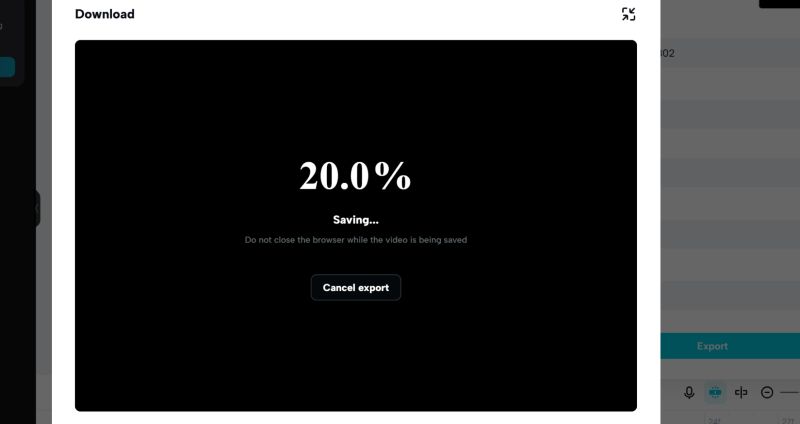
Step 4. Click Export at the top. Choose resolution and format (MP4 or MOV), then confirm.
How to Remove Wind Noise from Videos Using Desktop Software
Now let’s move to desktop tools. These are more powerful and give you deeper control.
They do require installation. And in some cases, a bit of patience because the interface can feel overwhelming. But the trade-off is precision. You decide how much wind to remove and how natural the final result should sound.
Way 1. Use Eassiy Video Converter Ultimate
Best for
Casual creators and beginners who want an all-in-one video editing suite with strong results and a simple interface.
Ease of use
Easy — requires absolutely no audio engineering knowledge. The noise reduction works through an analysis algorithm, so it’s mostly a simple checkbox workflow.

Eassiy Video Converter Ultimate ranks here because it packs more than 20 important video and audio utilities into a single beginner-friendly program.
You don’t need to learn how to mix tracks or apply manual EQ to clear wind. Instead, it provides a dedicated enhancement panel where you simply load your video and choose what improvements you want, whether that’s removing noise, upscaling resolution, or even reducing camera shake.
When it comes to video noise removal, it performs exceptionally to remove all kinds of background sounds: wind, static, rumble, soft continuous “shhhhhh”, whether recorded outdoors, near open windows, or on older devices. Another good aspect about Eassiy is that it focuses especially on smoothing constant noise without making voices sound artificial.
Steps to Use Eassiy to Claer Wind Noise
Step 1. Launch Eassiy Video Converter Ultimate. Move to the Toolbox tab and choose Enhance Video from the left pane.
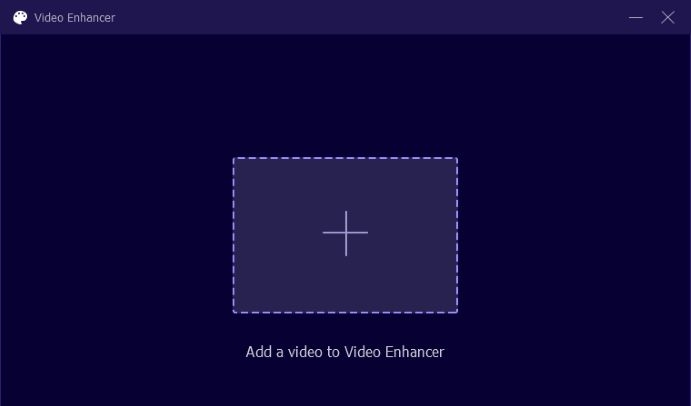
Step 2. A blank window appears with a large plus icon. Add the video you want to clean.
Step 3. After loading, you’ll see four enhancement options:
- Upscale resolution
- Optimize brightness
- Remove video noise
- Reduce video shaking
Tick Remove video noise to activate the noise cleaner. You can enable other options if your footage needs visual fixes.
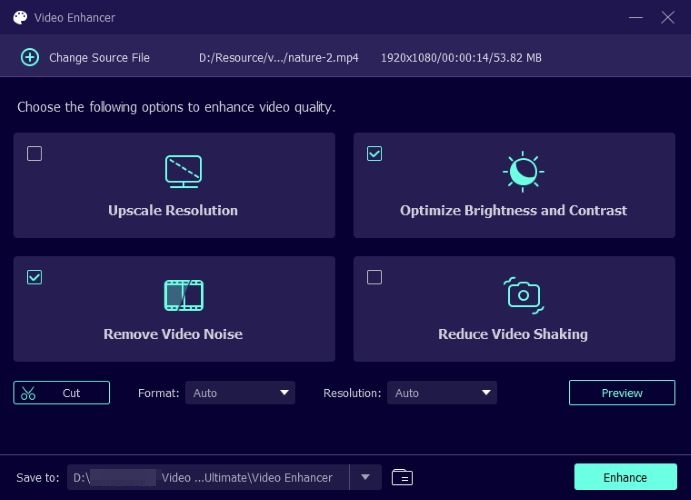
Step 4. Use Preview to watch a short segment and listen to how much the wind noise has been reduced.
Step 5. Click Enhance to process the video. Save the cleaned file to your chosen folder.
Way 2. Use DaVinci Resolve
Best for
Advanced professional filmmakers, advanced YouTubers, and audiophiles who want a studio-grade editing suite.
Ease of use
Medium — the software has a steep learning curve, but the noise reduction itself can be simple. It can feel difficult for free users.

DaVinci Resolve is an absolute powerhouse in the film industry. Yes, it is used for Hollywood-level productions. While it is a full-suite video editor known for its color grading, its audio workspace called Fairlight is respected too.
On the free version, you mainly work inside Fairlight to handle noise. That means learning how the tool behaves. You often need to study frequencies and tweak parameters to tame wind properly. Otherwise its engine will struggle to separate speech from unwanted noise (well, it mostly depends on how you set things). This can feel technical when you are new.
With DaVinci Resolve Studio (one-time payment of US$295), you can get access to the Voice Isolation switch. This feature can strip away wind, traffic, and room noise while keeping dialogue clear.
Steps to Reduce Wind Noise via DaVinci Resolve Studio
Let’s look how DaVinci Resolves works for free users as well as its paid members.
Free version (Fairlight method)
Step 1. Install and open DaVinci Resolve. Import your video and place it on the timeline.
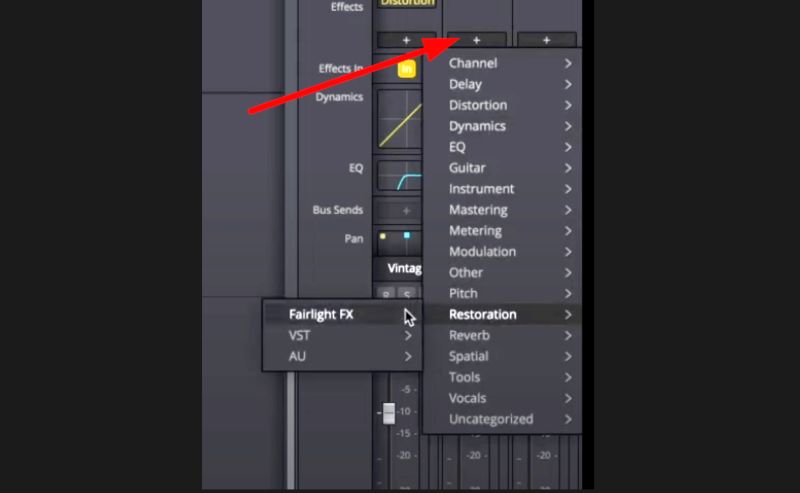
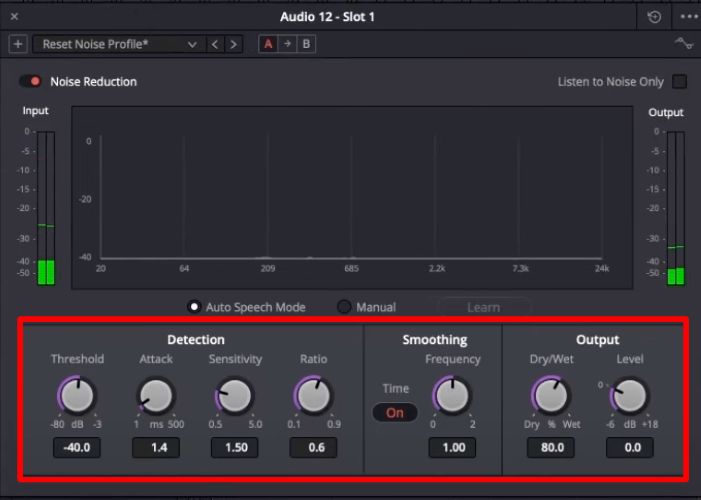
Step 2. Go to the Fairlight page at the bottom, open the Effects Library and find Noise Reduction under Fairlight FX.
Step 3. On the Noise Reductiontab, enable Auto Speech Mode. It will analyze the audio and automatically remove the identified background noise.
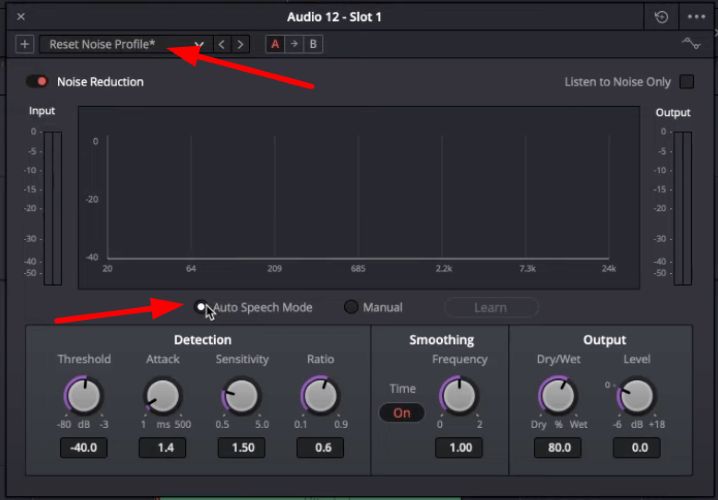
Note: If the Auto Speech Mode doesn’t work, you have to adjust parameters like threshold, sensitivity, and frequency, etc. You can even fine-tune smoothing and output mix (dry or wet) as needed.
Studio version (Voice Isolation)
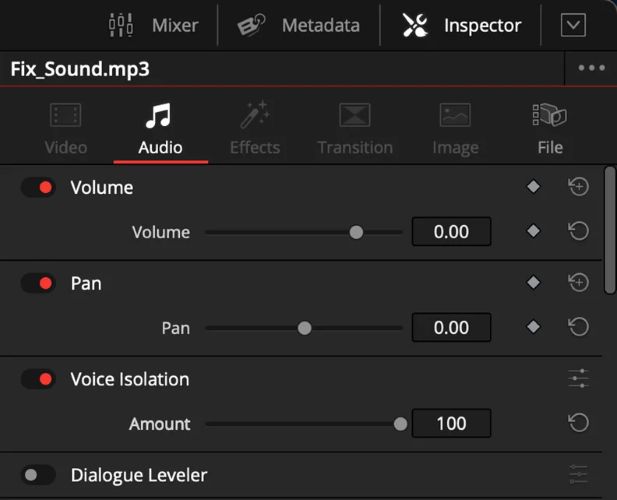
Step 1. Select your clip on the timeline, so it highlights.
Step 2. Head into Inspector panel. Then, go to the Audio section (speaker icon).
Step 3. Enable Voice Isolation. By default, it will apply at 100%. You can slide the strength until it feels natural.
Step 4. Go to the Deliver page (rocket icon). Choose your export settings and render the video.
Way 3. Use Premiere Pro
Best for
Dedicated content creators, documentary filmmakers, commercial editors or anybody embedded into the Adobe ecosystem.
Ease of use
Medium: It’s Adobe’s signature environment with many panels, but the audio cleaning process follows a simple guided flow.

Adobe Premiere Pro is the industry standard for subscription-based video editing.
Here, wind noise can be manually handled in two ways. One is the manual route — applying a Parametric Equalizer to cut low-end bass frequencies. The other is using the DeNoise effect (well, it doesn’t work great).
Now, however, Adobe has also integrated AI — the exact same intelligence that powers Adobe Podcast. So you are essentially getting the Enhance Speech feature inside Premiere.
Where you can really make a difference is by combining this with manual control when needed. When you use Enhance Speech, you also get extra flexibility. You can isolate wind, apply AI enhancement, and critically use the Mix Amount slider to blend the clean AI voice with your original track. This way, the environment doesn’t feel artificially dead, which is common when using Adobe Podcast alone.
Of course, you’ll need an Adobe Creative Cloud subscription (US$22.99/month for the single app). So it makes sense mainly if you produce regular YouTube content or rely on the full editing suite.
Steps to Clear Wind Noise Using Premiere Pro
Here you get two paths — the AI way or the original manual way. Let’s look at both.
AI method (Enhance Speech)
Step 1. Launch Premiere Pro. Bring in your footage and place the windy clip onto the timeline.
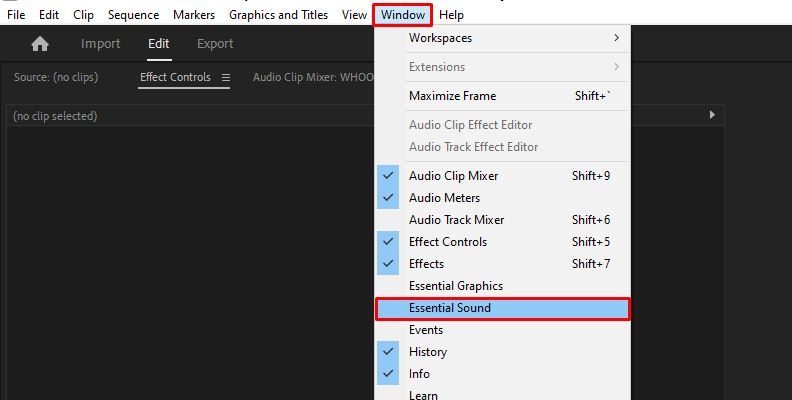
Step 2. Click Window in the top menu bar. Select Essential Sound.
Step 3. Select the audio clip on the timeline. In Essential Sound, press Dialogue and Premiere will treat it as spoken audio.
Step 4. Locate the Enhance Speech section and hit Enhance. Premiere will take a moment to rebuild the voice and suppress the wind.
Step 5. Use the Mix Amount slider. At 100%, you get a studio-like sound with zero wind. Pull it back to around 60–70% if you want some original ambience to remain.
After this, export the media using your desired settings.

Manual method
You have two options here.
Option 1 — Cut wind rumble with High Pass
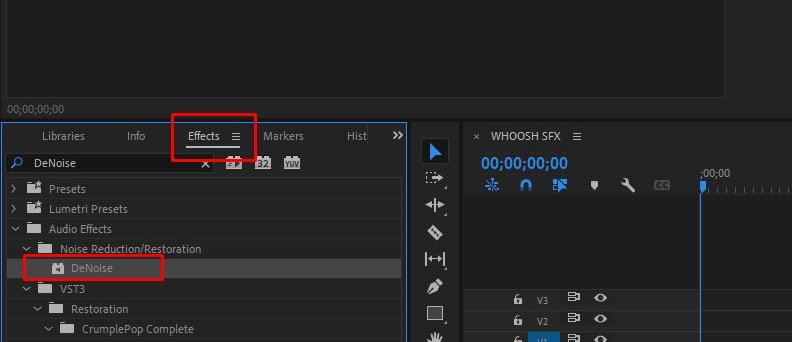
Step 1. Open the Effects panel.
Step 2. Search for Highpass. Drag it onto your audio clip. This removes deep wind rumble.
Step 3. Set cutoff roughly between 100–200 Hz to target low wind frequencies.

Option 2 — Reduce noise with DeNoise
Step 1. Search for DeNoise in Effects and apply it to the clip.
Step 2. In Effect Controls, click Edit and adjust Amount until background hiss softens without harming dialogue.
Tips to Get Better Results and Avoid Wind Noise Next Time
Here are a few practical habits that make these tools work better and help you capture cleaner video audio in the first place.
Tip 1. Fill the Silence After Heavy Noise Removal
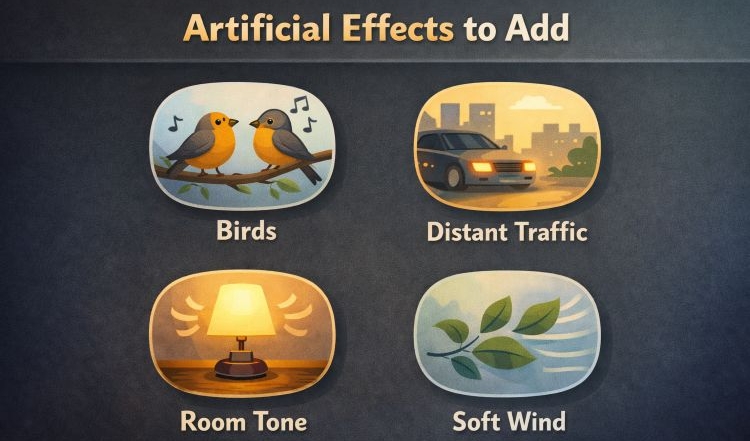
Some tools, like Adobe Podcast and DaVinci’s Voice Isolation can strip away natural room tone along with the wind noises. When that happens, the video will feel unnaturally quiet.
So you can add a light layer of ambience: soft birds, distant traffic, or subtle room tone. So, the background will feel natural.
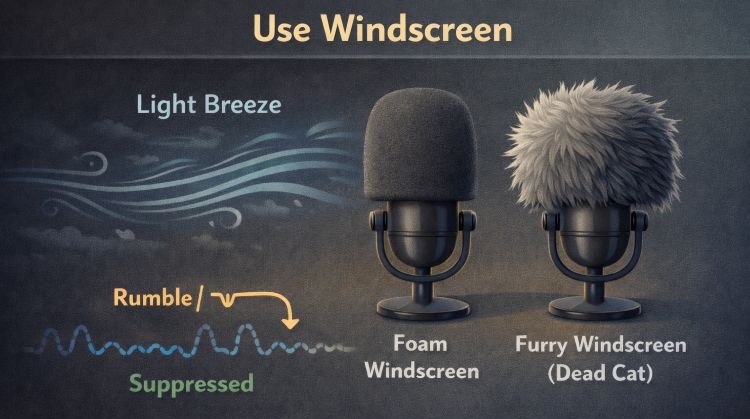
Tip 2. Use a Windscreen on Your Mic
You can use a foamy cover to diffuse the air before it hits the mic capsule. It works great for light breezes. For stronger wind, switch to a “dead cat” (the furry windscreen).
These covers will prevent the deep wind rumble that is often hard to fix later.
Tip 3. Use Your Surroundings as a Shield
If there’s no windscreen nearby, you can let physics help you.
Next time you record, stand with your body between the wind and the mic or move near a wall, tree, or car. Small angle changes can noticeably cut wind blasts.

Tip 4. Keep the Mic Close to the Speaker
Distance invites noise. Bring the mic closer or use a lav mic under clothing to boost the voice relative to the wind. This way, you can clean up the background noise easily post-production.

Conclusion
Today, these are the best ways to remove wind noise from your videos. AI features in Adobe Podcast, CapCut, DaVinci (paid version), and Premiere Pro can give clean dialogue fast. The problem is that they often clean too aggressively, so the video feels artificial.
If you want desktop control but with a simpler workflow, Eassiy Video Converter Ultimate is practical. And if you prefer AI but keep the voices natural, Mediaio AI Video Enhancer is the way to go.